Tuesday, September 8, 2015

Fall front porch

I wonder if anyone else out there is like me...
Hi, my name is Victoria and I have decorating A.D.D.

Whew, glad that is over. 

I can't decide on a style of decorating nor can I decide on how I want things decorated.   I am constantly moving things around and changing things up.  Heck last Christmas I redecorated my mantle Christmas morning... yep I'm THAT girl. 

Now I tell myself that great ideas come to those who wait or that if I live with something for a while it will 'grow' on me or even the; I move things around a lot because the décor gets better and better with each transition. 

Yes I lie to myself to make myself feel better about being well... decorating deficient. 

So here we are finally in September and well I need to decorate my front porch. It is small as front porches go but it looks nice when decorated.  I am ashamed to say that it has been naked all summer.  Only a wreath for décor... sad bad blogger! 

In late August I made a list of things I'd need for fall and Thanksgiving decorating.  Then I shared my secret - I take pictures of everything so if I run into something in a store that I just love I'll know if it will go with what I've already got!  So I bought Mum's; 2 large and several small ones.  I put the 2 large ones each in a set of buckets that I've had for years.  The small ones I planted in my front garden to give it a little pop for the fall. 

Now to decorate.  This is where I usually falter because I can't decide. 

I started with some bales of hay that I lovingly wrap up each November and carefully put away.  Yes you read that correctly; I wrap up $5.00 bales of hay like they are precious glass. 
I move them around and put them on angles or I lean one or two.  Then I get our my scarecrows and place them around the bales and add my flowers. 

I do have several wreathes that I use in my outdoor fall scene and I put them up next along with some faux garland.  I made the one on the door last year - check out how to make it here...
http://www.dragonfliesandthistles.blogspot.com/2014/10/multidimensional-fall-wreath.html


Last year I put several scarecrows in the yard but they are in bad shape so I didn't put any out this year.  Broken, sad or just faded outdoor décor just makes everything look bad. 

I live with that for a while.... a while.  This is what the front originally looked like.
Sad.  But then I changed things up a bit.

I added a table from my back porch and shifted things around a bit.  The candle lanterns I got at Kirkland's really cheap, like $5.00 a piece!  They look really nice lit up at night and it makes the house look very inviting.


I like this so far but don't count on it being the same by the end of September!  I still think it needs something else... possibly a chair?  hmmm. 

Stop back and see if things stay the same for next week!  

Thanks so much for stopping by.  I really appreciate your support.
Next week I'll be sharing my fall home tour.  Until then, stay safe!
Victoria

You can follow me on Pintrest -
https://www.pinterest.com/vicdenniso/

I'm on Facebook as well -
https://www.facebook.com/pages/Dragonflies-and-Thistles/491393717621010?ref=hl

Or you can follow me right here on the blog!
www.dragonfliesandthistles.BlogSpot.com

Monday, August 31, 2015

Painted Mason Jars

Mason Jars are all the rage right now and while I usually don't jump on a fad I must admit I like the look these versatile beauties can bring to your décor.

Mason jars come in so many shapes and sizes that you can really let your imagination run with how to use them in your décor or everyday life.  I know you've seen them as drinking glasses heck I even saw one glued to a short candlestick being sold for over ten dollars each as a redneck wine glass.  My gosh you could buy a case of mason jars and dollar store candlesticks and glue them yourself for less than that! 

Here is my finished product.

I chose to do 4 jars but you can do as many as you want, even 1 would be a nice touch to your fall décor. 

So you will need: 
1.  Mason Jars - I bought a case of pint jars at Walmart for $6.00.  Mine have no name on them because I decided that wasn't the look I was going for but you could buy them with a name on them to give them some extra texture.

2.  Paint.  I just bought craft paint from the craft store.  I did purchase several different kinds, chalk, gloss and matt paints.  I bought the smallest tubes possible.  Colors of your choosing.  I did traditional fall colors of orange, yellow, red and light brownish grey. 

3.  Jute, rope, twine or something to wrap around the neck of the jar. 

4.  Charms, bells or some embellishment to jazz up the jars.  You could use buttons or just a simple bow depending on the look you want. 

5.  Paint brush, water and a paper plate

6.  Scissors

7.  Plastic bags - 2 (1 for your hand if you don't want to get your hand messy and 1 to place the jars on to dry). 

8.  Some sort of faux flowers or leaves etc. to put in your jars.  I bought 'picks' at Hobby Lobby when they were 40% off. 

Lets get started!
First clean your jars really well.  Since I got mine brand new I just washed them with soapy water and let them dry thoroughly.  If you are recycling jars after you wash them it is recommended that you wipe them off with rubbing alcohol and let them dry well.  The rubbing alcohol will take off any residue that may be on the jar. 

Next - Let's paint! 
If you don't want your hands to get messy wear gloves or put a plastic bag over your hand. 
I poured some paint onto a paper plate and used that as my pallet.  Make sure you wash your brush thoroughly between colors. 
Let the jars dry really well between coats otherwise you may pull off the under coat when painting the next layer.  I let mine dry overnight between each coat of paint. 
The photo above is 1 coat of paint. 

TIP - DO NOT use paper like I did to dry your jars as the paint will dry to the paper which equals stuck jars.  Then you'll spend time picking or scraping off the paper from around the lid.  Use a plastic bag to dry your jars.

I did 2 coats of paint on each jar. 

OPTION 1 - After several coats of paint you could take a piece of sandpaper and lightly rub some of the paint off.  This would give a more rustic effect to the jars. 
OPTION 2 - You could give the jars and even more rustic effect by painting them brown first then your color, say yellow, then when dry use sandpaper to expose some of the brown coats underneath. 

Next I just got some twine and wrapped it around the neck of each jar.  I wrapped until I liked the look; you can wrap once or multiple times as I did.  I left the ends long so I could string a bell and an acorn charm through each end of the twine then knot them to hold everything secure.

OPTION - You could use a ribbon or raffia instead of twine to wrap the jar neck.  You could also leave the jar neck exposed. 

Finally I got some faux flora picks from Hobby Lobby and put them in the jars.  You could use real flowers for a very pretty look as well.

Other options for the jars:
OPTION1 - Tape a stencil on the jar and only paint the stencil area.  Pick a fall type of stencil or you could spell out the word 'FALL' one letter on each jar. 
OPTION 2 - You could do the reverse.  Instead of only painting the stencil area, paint everything BUT the stencil area.  This would leave the reverse clear glass.  Now you can fill the jar with acorns, beans, dried corn or stones then put a tea light candle in the jar.  The candle will shine through the clear stencil part.  This could be really pretty. 

Next week is a holiday week I'll be blogging late, probably on Wednesday but I'll be sharing my front porch.  I think I've finally got it to where I like it. 
Also upcoming is a fall house tour then a Halloween craft with the mason jars - hey I've got a whole case of them to find uses for! 

As always I'm on FB - you have to interact with the page to see it on your newsfeed so give it a like or comment.
https://www.facebook.com/pages/Dragonflies-and-Thistles/491393717621010?ref=hl

I'm much more active on Pintrest, heck I've burned dinner 'pinning'! 
https://www.pinterest.com/vicdenniso/

Thanks so much for stopping by.  I truly appreciate you reading and your support.  Until next week have a happy Labor Day holiday and Stay Safe!
Victoria

Monday, August 24, 2015

Lighted fall vase

I have an easy and pretty cheap fall craft for you today!

Two things I like about this. 
1.  I had most of the items on hand so CHEAP!
2.  It was fast and easy to do. 


You can do this in any glass container, I'll show you 3 versions and give you some tips and as always alternatives.
 
 
For this you will need:
 
Pine cones - I went for a hike in the nearby woods with the dogs and collected pinecones and acorns.
Vase filler - if you so desire.  I did buy some from Kirkland's for $7.99.  I also had some vase filler from last year that I used.
I also bought faux fall leaves from the dollar store
A string of colored or white battery operated lights.  I got LED so they wouldn't get hot.
Batteries for your lights
A vase, mason jar, apothecary jar, pickle jar or any type of glass jar you want. 
 
 
So let's start.
 
First make sure your jar is clean.  I washed mine in mild soapy water and dried them thoroughly.
Next you want to put your batteries in your lights and make sure they work.  I also did this with the lights on so I could see how the lights shown through in the jars.  I'd do a couple of things differently but we'll get to that in a moment.
So put a bunch of the strand of lights in the jar.
 
 
Now you just drop your fillers into the jar around the lights. 
TIP - if you are working with a mason jar, I'd use a wide mouth jar.  I have small hands and if I wanted to manipulate something I ended up having to use scissors as my hands wouldn't fit in the jar.
 
Keep filling and adding the strand of lights until you are happy with the results.  I topped mine with a pinecone.
 
So here is what I'd do differently with this - I'd get a lot more smaller pine cones or use a wide mouth jar and fill the jar with less small filler.  I don't think the lights shown through as much as I'd have liked them to. 
 
Here is another kind of jar you can use.  I got this vase at the dollar store.
 
 
Again, too much filler and not enough of the light is shinning through. Now I could use 2 sets of lights if I wanted to keep the amount of filler I have. 
 
TIP - just hide the battery pack behind the vase.  You can't even see it and the pack will be in easy access for you to turn on and off. 
 
 
Finally I used my apothecary jars.  I got these at Home Goods a few years back and heck I fill them with everything. 
 
 
I like this much better, it has less small filler and more pinecones and faux leaves.  I think the light shows through better and that is the look I wanted.  Unfortunately you can't see if that well in this picture but trust me the light shows through. 
 
Alternatives:
All pinecones (no filler or faux leaves at all)
All faux leaves
Paint your jar or vase.  Yep paint the outside of the glass jar a fall color say light brown or yellow and fill with just the lights.
 
Next week I'll share the method to my madness to decorate my exterior for fall.  I'll be using things I have on hand just in a different way.  It is a process I go through with just about everything.  I live with it for a bit then change things up until I get it how I like it.  So please stop back!
 
Thanks so much for reading and stopping by.  I really appreciate your support!
You can always follow me on Pintrest - take a good look at my 'I love fall' board.
 
I am on Facebook but because of how FB works you must interact with my page by either liking or commenting otherwise you won't see me in your new feed..... thus I am not as active on FB.
 
You can also follow me right here on the blog!
 
I'd love to hear from you!  I answer every comment.  I'd love to see what you are making for fall already and if you are starting to decorate!  I'd also love to see if you try this craft your outcome and where you use it in your décor. 
Until next week,
Stay Safe!
Victoria
 
Sneak peak of my front door.  I made this last year.  I'll share that link next week as well.


Monday, August 10, 2015

Fall decor planning

This is the time of the year when I start planning my fall, Halloween and Thanksgiving decorating.  I try to change it up a bit every year but I also try to use what I've got first.  I don't have a ton of money to spend on new décor every year but I am not one to keep something year after year if I haven't used it in my décor. 

I'll walk you through what I do.  This is my process; gleam from it what you want.  I hope it helps you. 

My first step is to determine what I want to do décor wise this season.  I turn to Pintrest and the internet.  Check out my "I LOVE Fall"  board.
https://www.pinterest.com/vicdenniso/

https://www.pinterest.com/vicdenniso/i-love-fall/

Here is my Halloween board -
https://www.pinterest.com/vicdenniso/halloween/

When you start reviewing what you are crushing on you should start to notice a pattern emerging in your choices be it be color, patterns or theme. 
I tend to like non-traditional colors mixed with traditional elements.  So blue, robins egg or turquoise mixed with white and then pumpkins, gourdes, pinecones, twigs and other natural elements.   

 I found these two tablescape's on Pintrest and I'm in LOVE!


 TIP - Take stock of what you have already on hand.  I have my hubby pull all the fall, Halloween and Thanksgiving bins out of the attic this time of the year.  My craft room/office is a mess right now with boxes and bins everywhere. 
I go through each bin and unwrap each item and look it over.  Now is when I ask myself.
1.  Did I use it last year?
2.  Will I use it this year?
I will not keep anything that I just keep wrapping back up and not using year after year.  My rule of thumb is 2 years.  If I haven't used it in my decorating in the past 2 years it goes. 

I also look each item over and review -
1.  Is it shabby?  Been loved too much?
2.  If so, can I repair it?  Do I want to?  Do I still love it?  Is it worth it to repair? 
3.  Do I want to replace it? Can I replace it? 
4.  Is it a family heirloom?  If this is yes, I WILL wrap it back up even if I don't use it
5.  Does it have sentimental value?  This is a personal one for us as everyone has a different attachment to things.  I keep a 2 little plastic reindeer that were on a Christmas cupcake from when I was about 7 years old.  It is the last Christmas my Grandpa (Pops) was alive and he gave me his reindeer to take home and babysit until next Christmas.  I've never EVER getting rid of those silly plastic reindeer that have seen better days.

But inevitably year after year figurines will get chips in them or possibly a broken hand no matter how well you try to wrap them up. 

TIP - If the item looks like it has seen better days then toss it.  It won't enhance your décor, (unless it has sentimental value - see #5 above). 

I also take this time to look through my linens, tea towels, table cloths, placemats and runners as well as napkins and even pillows.  I ask myself those same questions over and over to take stock of my inventory.  I make a pile for donations and one for keeping. 

The one thing that does tend to get shabby quickly is faux flowers, garlands, wreaths and picks.  They will get smashed or bent; picks will loose their color and wreaths can come apart in my hot attic.  Even bows can become unsightly after only 1 or 2 seasons so I have a more critical eye here as far as what I keep and what goes. 

After I've gone through everything (trust me it is fun, like Christmas in August! The kids even like helping me) and I've made my keep and discard piles I do something my family thinks is crazy but I think is, well sheer genius!
I take pictures of everything I'm keeping with my phone. 

TIP - TRUST ME!  taking pictures of your items will help you when you go to the store.  You won't have to guess if something will look good together or if what you have on hand is similar, you'll have the picture right there in your hand. 
I also take pictures or download to my phone my inspiration pictures from Pintrest. 
Now you've got everything in one place with you when you are out and about. 

After I have carefully re-wrapped everything I'm keeping and re-boxed it all I then review my Pintrest board and using my handy dandy phone I'll come up with a design plan.  Then I make a list of things I need to get (I'll use my phone here too).

My list this year is looking like this.
1.  Candles - Pumpkin, Fall Leaves and 2 other jar candles
2.  Candles - White pillar, votive and tea lights
3.  Candles - Scent wax for my warmers
4.  Votive/Pillar candleholders - Kirkland's
5.  Faux hydrangea in fall colors and dusty blue
6.  Ribbon in fall colors
7.  Mason Jars

TIP - be specific in your list.  Notice I'm heading to Kirkland's to get Votive/pillar holders... I saw this on their website and fell in love.
TIP - your money is precious - DON'T BUY IF YOU DON'T LOVE!  Keep to your list but if you do find something in a store you love ask yourself.
1.  Can I use it in my current décor plan? (I check my phone pictures for this)
2.  Is it worth buying?  Can I live without it and chance that I can get it on sale later or after the season? 
If you will be kicking yourself when it isn't there in October then buy it but save the receipt.  If you don't use it or change your mind about it you can always return it. 
I will be buying that lovely above cause I love, love, love it.  It will go with my color theme that I've got in mind (blue's with rust/orange)

Since we are still a bit early to decorate for fall you will have the chance to watch for sales and get good prices.  I always shop at the end of the seasons as well when things are up to 70% off but I still ask myself the same questions.  Even if I only spend $5.00 on something if I never use it I've wasted $5.00 and heck that is a school lunch!
I tend to buy more faux flowers at the end of the season.  These items have gotten really expensive over the past few years and they don't seem to hold up for more than 2 seasons here in the Colorado weather so any money I can save on them I will. 

I also look for coupons online and in the paper.  Did you know that Hobby Lobby has an online coupon every 2 weeks for 40% off one item?  You do know that Bed Bath and Beyond takes expired coupons don't you....and you can use a coupon for each item you have. 

Here is what I did last year for fall (September) mantle:
http://www.dragonfliesandthistles.blogspot.com/2014/09/fall-mantel.html
This was my November mantle:
http://www.dragonfliesandthistles.blogspot.com/2014/11/thanksgiving-mantle-step-by-step.html

I will be using some of these same elements this year but switching it up and adding blues and turquoise to the mix of oranges, rust and white. 

Well that is all I have for today.  I hope you will be able to take some of my tips and use them in your own decision making for your fall décor. 
Do you have any tips or tricks that I didn't mention?  I'd LOVE to hear them.  Drop me a line and let's chat.
Thanks so much for stopping by.  I appreciate you reading and your support. 
Until next week.  Stay safe.
Victoria
I'd love for you to follow me on Pintrest -
https://www.pinterest.com/vicdenniso/

I'm on Facebook but not quite as active due to how FB works.  You need to watch for my post every week and like it or interact by messaging me on FB to see it in your newsfeed.
https://www.facebook.com/pages/Dragonflies-and-Thistles/491393717621010?ref=hl

I appreciate you following me directly on the blog - you can message me here as well.
www.dragonfliesandthistles.BlogSpot.com

You can also email me personally at -dragonfliesandthistles@gmail.com


Monday, August 3, 2015

MAJOR serious house problems

I mean MAJOR. 
We had a bad storm a few weeks back and I think our house was struck by lightening.  I know the house behind us and to the left was struck because I saw the lightening hit and their roof caught fire. 

I think ours was struck as well.  In the past few weeks we've had to replace several appliances and a light fixture.  First up is our dishwasher.  I turned it on and it started smoking - NOT GOOD.  When my husband took it apart to install the new stainless dishwasher he found the motor was burned up and had even charred the cabinet a bit.  NOT GOOD. 

Now I know that dishwasher motors can burn up if they are old or faulty.  BUT.... My husband turned on the hall light in our entry the very next day and the thing caught fire!!!!  I don't mean sparks I am talking flame! with busted glass everywhere.  (On a good note I do now get to pick out a nice new entry light)...

Finally our microwave... My husband was heating up his lunch the very next day and yep, you guessed it sparks, smoke and then nothing.  The entire unit went dark.  Now this didn't upset me too much.  We did have the red neck microwave being held together with electrical and duct tape!  So a nice shiny new one in stainless is now at home in my kitchen. 

I was afraid to turn anything on in the house for a few days out of fear of what would go next!  We had an electrician come out and make sure all the wiring is in good working order; luckily it is. He couldn't give us an answer as to why two pieces of electrical equipment and a light would go out in such succession other than coincidence.  Nothing that went was on the same breaker.  Personally my theory is that our house was either struck or had some affect of the lightening strike behind us. 

So I really don't have a blog today as we are working through these issues.  I did go on vacation for a while in between all of this.  We camped in Lake City Colorado, my secret spot.  A lot of riding ATV's (Razor's), hiking and fishing.  It was a great time and it is so beautiful there. 

 
I will be back next week with an update on the electrical situation and may be a new entry light. 
Also, I'm going to my first ever country music concert in Denver this weekend... Kenny Chesney and Jason Aldean.  I'm originally an East Coast city girl and when and where I grew up Lynyrd Skynyrd was country but I can't wait!!! 

Until next week, Stay Safe!
Victoria
Thanks so much for stopping by.  I appreciate you reading and your input. 
You can follow me on Pintrest -
https://www.pinterest.com/vicdenniso/

Facebook -
https://www.facebook.com/pages/Dragonflies-and-Thistles/491393717621010?ref=aymt_homepage_panel

And right here on the blog!
www.dragonfliesandthistles.BlogSpot.com

Monday, July 13, 2015

The ugliest side yard in the world

No really and truly.


The backyard is really great with the garden and green grass but the side yard has become a collection of junk.  However, this part of the yard is right off the deck and where we entertain and grill.  YUCK.

We finally took the microwave and the hot tub cover to the dump, we recycled the paint and toilet - did you see the old toidy there? 

The people that lived here prior had red rock on the side... personally I am not a fan and over the past 5 years we've been digging up rock and giving it away and yet we still have more rock so I give up on trying to get rid of it. 

What I'd like to do is level the side - we live on a hill and when it rains here the water just rushes down this little hill.

We are having the fence re-placed this summer and I've got to find a place for the firewood.  But what to do with this little section of yard? 

I've had some ideas but I'd love to know what the readers think.

I think I may need to do steps since I'm going up/down hill.


But if I could go flat I like these.


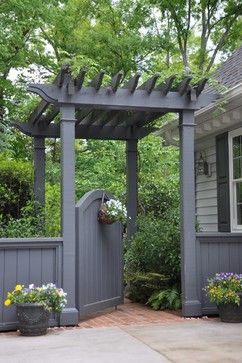
I also like the idea of getting rid of the ugly gate and may be doing a pergola even possibly with a nice gate attached (we do have dogs and kiddo's to keep contained).
 

I'd also like to keep the grill in this area if I can. We will have to keep the trash there but I like the idea of hiding that.


 Ultimately I'd like to move the grill to the cement slab outside of the garage but that is another mess that we are currently clearing!  Why do men think they need to save every scrap of wood, every nail and nut/bolt they find?  We have scraps that are too small to do anything with. 

I did however save the scraps of cut picket fencing from the back and other side yard - I'm going to make planters out of them.  More on that in a later post!

You can see all my garden ideas on my Pintrest board.
https://www.pinterest.com/vicdenniso/garden/

I'd love to have you follow me on Pintrest!
https://www.pinterest.com/vicdenniso/

Thanks so much for stopping by.  I'll be gone for 2 weeks coming up.  I'll be taking a vacation here in beautiful Colorado.  Riding ATV's, camping, hiking and a lot of photography that I'll share when I'm back on August 1. 

I'd love to hear your ideas for our side yard - what would you do in this narrow space - 5 1/2 feet wide and @ 30 feet long on an incline.  I can't wait to read your ideas.
Thanks to everyone who read and gave me suggestions last week on my dinning room furniture.  I really appreciate the comments. 
Until August - stay Safe!
Victoria

You can also follow me on Facebook -
https://www.facebook.com/pages/Dragonflies-and-Thistles/491393717621010?

I'll be on Instagram soon!


Monday, July 6, 2015

To paint or not to paint... that is the question

I love the look of painted furniture just love it.  I have a lot of 'Pinned' painted furniture on my DIY board on Pintrest, (link below).  I am just afraid, very afraid of doing this myself.  The furniture I would want to paint is old, really old and has come from family.  What if I mess it up?  It's not like I can go back to what it was before without a lot of work once I start down the painting path. 

So, to paint or not? 

Lets start with my dinning room set.  My grandparents brought this from Scotland when they immigrated.  They came with 10 kids and the clothes on their backs.  Once settled in Baltimore my Grandfather sent for the dinning room set.  Miraculously it made it in once piece.  It was willed to me when my grandparents passed and I've brought it to Colorado. 

There are no nails in any of this furniture it is all dovetailed.

Let's start with the table.  First and foremost, the chairs you see below do not go with the table.  They go with the table that we have outside (you'll see that in a bit).  The chairs that go with the table have not faired as well as the rest of the set.  After all they are about 100 years old and the years have not been kind to them.  Without nails, (only dowels), they have become very unstable so we have them stored. 


The table needs a good sanding, I've done nothing to it over the years that I've had it.  It has some nice details in it.  Sorry it needs a good cleaning!  A bit dusty there isn't it. 


So, paint it?  Paint it all or just the base?  What color? 

The next contender is the buffet...broken leg and all.
You can see the leg details match the table. 
I feel like the buffet is the best contender for paint.  So, leave the top dark and only paint the body?  What color?  I've been leaning toward a robins egg blue or a blue green, grey or white? 

I've also got the china cabinet. 

I've thought about painting the inside a light grey or off white cream color but should I paint the entire thing?  So is this a better contender to paint? 

I'd only like to paint one piece of the dinning room set.  Otherwise I think it will be too much.  What do you think?  Should I paint the chairs as well?  I know I need to reupholster them and that is in the mix for this year.  Overall I'd really appreciate some input. 

I'd also like to paint our outdoor table.  This is the table that goes with the chairs I'm using in my dinning room right now.  It was my husbands GREAT Grandmothers kitchen table.  There are 3 leafs and a total of 6 chairs.  This table came from the great-grandmothers farmhouse in Cheyenne Wells Colorado and was willed to my Father-In-Law who gave it to my husband and myself.  So this is another piece of furniture that has special meaning. 


I was thinking of painting the base white and staining the top a dark walnut color.  What do you think? It is protected on our covered porch and in the winter I wrap it in plastic.  So a white base and dark stained top or a grey base and a dark stained top?  OR another color all together?  OR should I paint the entire piece? 
Again, I appreciate suggestions. 

Thanks for stopping by!  I appreciate your help and suggestions. 
Have a safe and happy week!
Victoria

You can always follow me on Pintrest -
https://www.pinterest.com/vicdenniso/

Facebook -
https://www.facebook.com/pages/Dragonflies-and-Thistles/491393717621010?ref=aymt_homepage_panel

Or right here on the blog!
www.dragonfliesandthistles.BlogSpot.com