Tuesday, August 19, 2014

Pintrest inspired craft

So I'm still on my Pintrest inspired or Pintrest completed crafts.  Today I am sharing a set of wood blocks that you can make and customize for your own décor and any season. 

Here is the original Pintrest pin that inspired this craft.
http://jessicaslife81.blogspot.gr/2012/09/fall-home-decorating.html

There are no specific directions on how to do this craft but it is easy enough to figure it out.  If you want to do the door or wall hanging, I would use Balsam wood.  You can get it at any craft store.  I chose to make blocks instead. 

Here is what you will need for my version:
  • Blocks of wood, one for each letter of what you are spelling.  I used a 'junk' 2x4 that we had in our stack of wood we 'shouldn't throw away because, see we can use it' pile. 
  • Craft paper.  I used a different color for each block of wood
  • Craft Glue
  • Modge Podge
  • Scissors
  • Block letters that will spell out whatever it is that you want to say
  • Glitter
  • Embellishments
  • Sanding paper or a sander to smooth the rough edges of the wood
  • Pencil
  • Level or square
  • Saw to cut your wood
  • Several paper plates - 1 for your Modge Podge and 1 for glittering each letter
  • Paint brush or sponge


Step 1 - Determine how large you want you blocks of wood.
I chose mine to be only a bit larger than my letters but you can make yours any size.  (You could even use 1 large piece of wood and write your entire word on 1 piece). 


Step 2 - Using your square or level and your pencil mark off where to cut your pieces of wood.


Step 3 - Cut your wood


Step 4 - Sand the sides and any rough edges of your wood
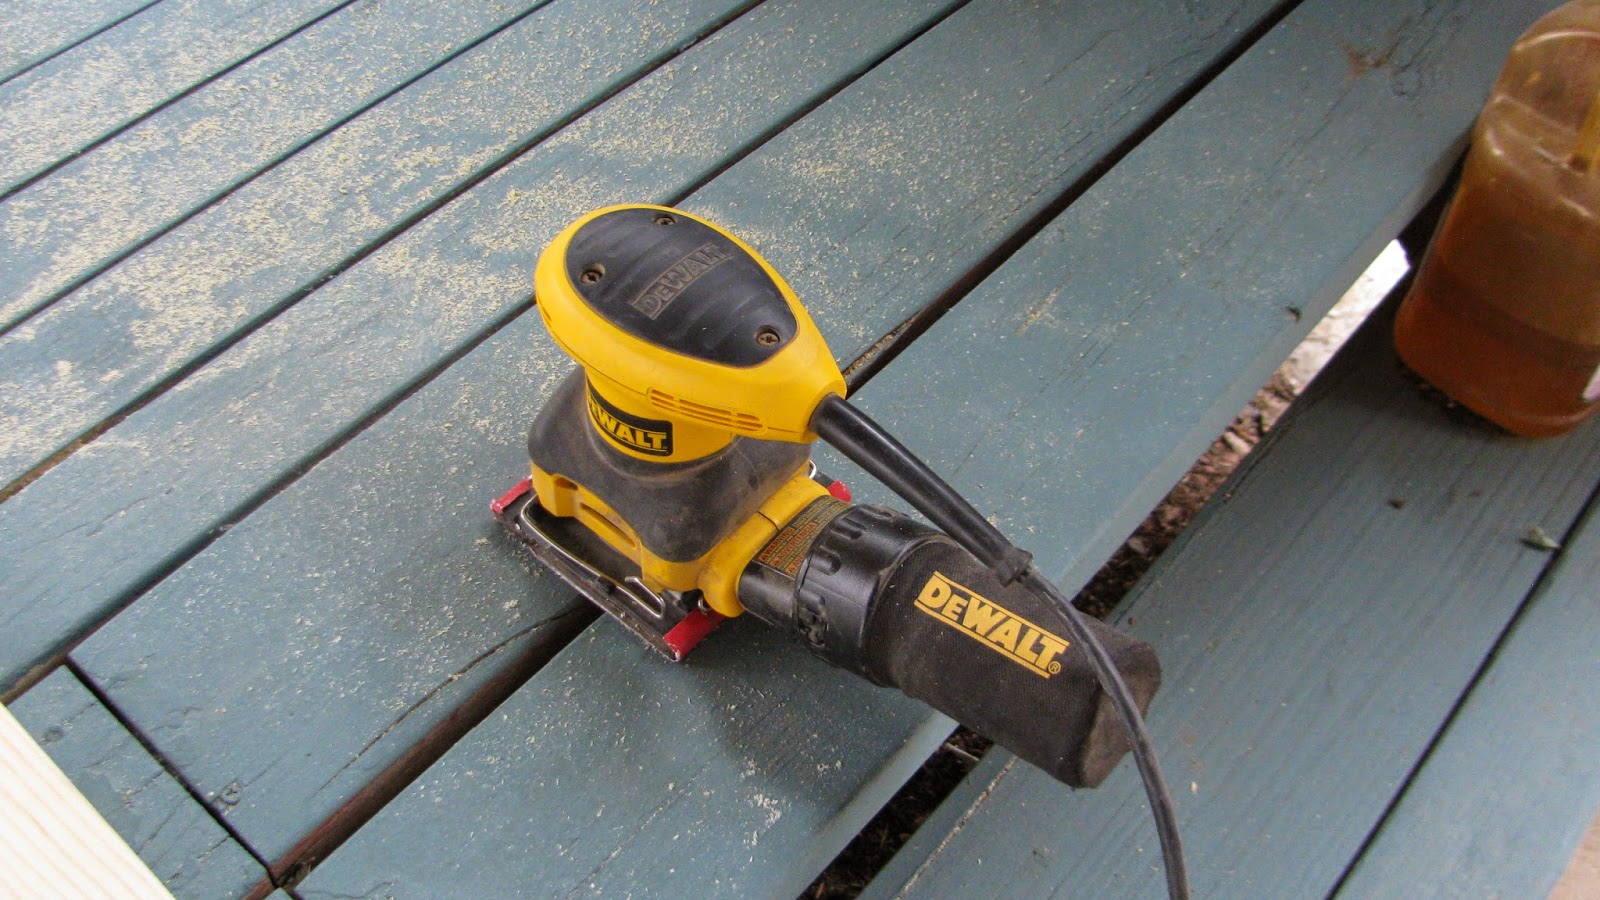


Step 5 - Wipe of your wood with a damp paper towel - this is to remove any sawdust that may be on your piece


Step 6 - Determine where and how large you want your craft paper.  I chose to have mine smaller than the piece of wood.  Mark your craft paper where you want it cut.

Step 7 - Using your level or square draw a line where you want your pieces of craft paper cut and cut your paper.


Step 8 - Using the Modge Podge, pour some out on one of your paper plates. Using the paint brush or sponge, paint the one side of your block.  You should paint the Modge Podge on the side you want your craft paper on.

Step 9 - Place your cut craft paper on top of the painted block and try to smooth out the edges. 


Step 10 - Using the Modge Podge and paint brush or sponge, paint a coat of Modge Podge over the top of the craft paper, cover it completely. 


Step 11 - Place your blocks to the side, they need to dry completely.  I let mine dry overnight.

Step 12 - Using your paper plates - 1 for each letter begin the process of covering them with glitter.  I used the Modge Podge and painted the correct side of each letter while on the paper plate then sprinkled the glitter over each one.  Set these aside to dry well. 


Step 13 - Once your blocks are dry and your letters are dry you need to glue the letters to the blocks.  First determine where you want the letters to sit on each block.  Then using the craft glue, glue the letters down on the blocks.


Step 14 - Embellishments - Now you can add any embellishments you wish.


Step 15 - Display! 
I know this seems like a lot of steps but it really isn't and the craft is pretty easy to do!  If you want to complete the wall or door hanging like in the original pin you'll need ribbon and some kind of punch to poke holes in the tops and bottoms of the letters. 

I like this craft because you can customize it to whatever season or saying you wish!  Have fun with it. 

Thanks for stopping by!  I appreciate you reading and checking the blog out! 
As always, you can follow me on Facebook - I only post when I post here on the blog.  During the summer that is Wednesdays.
https://www.facebook.com/pages/Dragonflies-and-Thistles/491393717621010

You can also follow me on Pintrest, I am much more active here.
http://www.pinterest.com/vicdenniso/

You can always follow me right here on the blog! 
http://www.dragonfliesandthistles.blogspot.com/

Have a great week.  Next week I'll be sharing my late summer garden before I go on a small vacation.  See you next Wednesday!  Be safe! 
Victoria

Tuesday, August 12, 2014

Pintrest Challenge, Bacon wrapped Tater Tot's!

I have challenged myself to do at least one thing a week off one of my Pintrest boards.  If you are like me, you've been 'pinning' away but not acting on any of those pins.  Well starting now I'm going to do something about it! 

Last Friday was my Father-in-Law's 65th birthday.  I was tasked with providing appetizers.  I thought, "this is a great time to start my Pintrest challenge and find something off my food board to bring!" 

I was excited to bring appetizers, I LOVE appetizers.  Heck I could make an entire meal from appetizers!  Plus it is a really cool word, APPETIZER! 

Anywho, I searched the food section of my Pintrest board and found a recipe for bacon wrapped tater tots.  Yep.  What could be better than bacon and potato!

Here is a link to the original recipe, yes as a bonus, the Pintrest link worked! 
Here is the 'Pin'
http://www.pinterest.com/pin/193865958934814925/
And here is the link to the site I got the recipe from..
http://www.madefrompinterest.net/2013/09/bacon-wrapped-tator-tots-bombs-appetizer/

Let me tell you... GOODNESS these are good.

OK bad news first.  This takes a bit of time to put together and it is messy.

Pintrest fail - The original recipe calls for shredded cheese, then you dig a hole in the tot and push the shredded cheese in then cover it back up.  BIG FAIL.  I have very small hands and I couldn't do this.  Plus realistically who has time for all of that?  If you can figure it out then good for you!  Instead I got a block of sharp cheddar (you could use whatever kind of cheese you like or skip the cheese all together) and cut it up into little tiny pieces, pulled the tots in half, stuffed a piece of cheese in there and pushed them back together.

You will need.
1 bag of Tater Tots.  I bought the extra crispy but you can buy whatever kind you like
1 package of bacon
Cheese.  Again, the recipe calls for shredded, I gave up and got a block and cut them into little pieces
1cup of brown sugar
Dipping sauces - this is optional.  I used Beer cheese, salsa - 2 different kinds, and BBQ sauce. 

Now assemble your items.
Preheat your oven to 400
Spray a cookie sheet - REALLY WELL! 
De-thaw 1/2 your bag of Tater Tot's
Cut your bacon in half.  I just used a knife, opened the package and cut the bacon in half. 

This is my cheese, I cut them in half again.

Now break your Tot in half

Stuff a small piece of cheese inside and put it back together.
Now roll it in a piece of bacon and place it seam side down on your cookie sheet.
I did as many as I had bacon for, it was quite a few, it filled my cookie sheet.  After this you want to spread your cup of brown sugar out on a plate. 
Next you are going to take each bacon wrapped tot and roll it in the brown sugar.  Replace them on the cookie sheet, seam side down.

When you have rolled all the tots in the brown sugar, place the cookie sheet on the top rack of the oven at 400 for 20-30 minutes or until the bacon is crisp. 

They are good on their own but really good in dipping sauce.  I used a jar Beer Cheese, two kinds of salsa and barbeque sauce. 
Needless to say they were the hit of the party!
I hope you try them! 

Next week I'll be talking fall. I've been pinning to my fall board like crazy and I've got several ideas for fall decorating.  I can't wait to share that and whatever I pick to complete off one of my Pintrest boards! 
Have a great week.  As always thanks so much for stopping by.  I hope you try the bacon wrapped tots.  Till next week, be safe!
Victoria

As always you can follow me on Pintrest -
http://www.pinterest.com/vicdenniso/

I'm also on Facebook, though not at active as I am on Pintrest.
https://www.facebook.com/pages/Dragonflies-and-Thistles/491393717621010

You can also follow me here, directly on the blog at..
http://www.dragonfliesandthistles.blogspot.com/

Tuesday, August 5, 2014

Shrimp on the barbie

I love seafood.  Growing up on the east coast of the United States, seafood is a way of life.  I grew up right on the Chesapeake Bay where all kinds of seafood is abundant. 

One of my favorite's is shrimp.

You can cook shrimp many ways, boil, stir fry, bake and even on the grill.  I've done this recipe inside on my indoor grill and when the weather permits, outside.  It is easy and you can change the ingredients to whatever you like. 

So for Victoria's shrimp on the barbie you will need:

 - Shrimp - I bought a bag of pre-cooked, frozen.  Jumbo size
 - Skewers.  I have metal ones that I bought at BB & Beyond.  You can use wooden, if you do you will need to soak them for at least 30 minutes in cold water.  Otherwise they will burn.
 - Seasonings.  Your choice here, pick things that go together.  I used Old Bay, honey, lemon juice, salt, pepper, red pepper flakes, natural coconut and dried chives. 
 - Liquor.  Again your choice, the alcohol will burn off so it is the flavor you want.  I used whiskey but you could use tequila, lemon cello or a flavored rum, vodka or wine. You could also skip the liquor and use barbeque sauce, jelly, marmalade or a jam.  I think orange marmalade or jam/jelly would be fantastic on the shrimp! 
 - A small bowl
 - A whisk
 - A brush to brush your seasonings onto the shrimp.
 - A hot pad or oven mitt
 - A plate
 - Non stick cooking spray

First and foremost, start your grill and get the burners going.  I have an old grill without a temperature gauge but I put the flame on what I consider medium heat.

Place your froze shrimp in a colander and run it under cold water.  You just want to de-ice the shrimp and start the de-thaw process.  If you bought fresh shrimp make sure they are peeled and de-veined as well as washed under cold water.  Let the shrimp drain then pat them dry with a paper towel. Set the shrimp aside.

Next, in a small bowl assemble your ingredients.  For my bag of shrimp I used the following:
1/4c of honey
1/4 c of whiskey
1 TBSP of Old Bay (this is a seafood seasoning)
1 tsp. lemon juice
1 tsp. dried chives
1/2 tsp. red pepper flakes
1/2 tsp. natural coconut

I then mixed the ingredients together with a whisk until the honey was dissolved.

If you are using metal skewers like I did make sure you spray them with a non-stick spray. 
Now you are ready to assemble the shrimp.

Taking a shrimp you skewer it through the meatiest part of the body then through the shrimp again near the tail.  I put 4 -5 shrimp on each skewer.  Do not squish them together, let them breathe on the skewer! 

Now lay all the skewers on a flat surface and salt and pepper each side of the shrimp.
You are now ready to grill!  Make sure you have a hot pad or oven mitt as the metal skewers get hot and the wooden ones may need to be picked up directly from the grill.

Place your shrimp on the grill as evenly spaced apart as you can. I put mine on an angle.  Using your brush, dip it in your bowl of yummy honey/liquor seasoning and brush the shrimp liberally on one side.  Close the lid of the grill and check them every minute to make sure they aren't burning and that you don't need to lower your flame. 

After 3 minutes, use your oven mitt or hot pad to flip the shrimp.  Repeat the brushing part - liberally you really want the shrimp to get all that good seasonings.  Close the lid again for another 3 minutes. 
Fresh shrimp may take about 4 minutes on each side - you be the judge, nice bright pink/orange shrimp are ones that are done!  For the pre-cooked and frozen you just want to make sure they are heated through. 
After they have cooked, using a fork slide the shrimp off each skewer and enjoy! 
I like this recipe because you can change up the seasoning.  I've made them using tequila and lime only.  I've made them with orange marmalade and chopped grilled peaches - yummy in my tummy!  If I've got smaller kiddo's around I will possibly make them using barbeque sauce. 

Again, here are the steps.
1 - Prepare your shrimp by either de-icing or peel and de-vein.  Rinse them under cold water then pat them dry with a paper towel
2 - Start your grill!
3 - Prepare your seasonings


4 - Skewer your shrimp
5 - Salt and pepper each side of the shrimp
6 - Place the skewered shrimp on the grill and using a brush and your seasonings liberally brush each side of the shrimp.  Remember each grills cooking times vary so keep a watch to make sure you don't burn the shrimp.  I did my pre-cooked shrimp for 3 minutes on each side on medium heat.
7 - ENJOY! 

I hope you give this recipe a try.  It is fairly easy to do and doesn't take a lot of time or effort for something that is a tasty treat! 

As always, you can follow me on Facebook at -
https://www.facebook.com/pages/Dragonflies-and-Thistles/491393717621010

I'm also on Pintrest (and much more active here) -
http://www.pinterest.com/vicdenniso/

You can also follow me directly here on the blog at -
www.dragonfliesandthistles.blogspot.com

Thanks so much for stopping by.  I'll be back next week with some ideas for fall decorating, yes I am already thinking fall! 
Till then, be safe!
Victoria

Tuesday, July 29, 2014

Glass Jar vase

Happy last week of July!

I don't know about anyone else but here in Colorado this summer has been delightfully cool and very wet.  It is a good thing for any lightening strikes that start fires, the fires here have been really bad the past 2 years, a lot of homes burned and even lives lost.  The rain is also good since the last few years we've had a bit of a drought.  Mid July through mid August is what is called 'monsoon' season here in Colorado.  The moisture from the Pacific comes flooding into the state where it hits the warm air rising from the south and they collide over the Rocky Mountains and create lots of rain and storms.  It is the precursor to fall and winter.  Our summers don't last that long, heck my spring flowers are just fading and the summer one's are just starting to bud.  They'll be all finished by mid August when we could get our first snow.  Yes, I said snow in August.  It has already snowed on some of the higher peaks here in Colorado, including Pikes Peak, this week.  Tomorrow it is only supposed to be 61 degrees!  I just don't know where the 'summer' has gone, I mean it is August already.  Wasn't it just May last month? 

As I sit here tonight writing this post it is thundering and lightening outside my window and the rain is coming down like crazy. On a good note, it will save me lots of money on my water bill for my lawn!  Always a good side to everything.

Since it has been so cool this summer we haven't been able to spend much time on our porch but I have still taken the time to decorate and make it look nice for the times we can use it this season.  This weekend I took advantage of the warm weather to do an easy craft that took little time and was pretty cheap. 

I like to re-use or re-purpose things instead of just throwing the item away and clogging up the landfills.  What I do is small but it makes me feel better.  One thing I never do is to throw away glass jars.  I re-purpose them for holding coffee in the camper or craft supplies or dog bones.  I even decorate some glass jars for candle holders, vases and other decorations. 

Decorating glass jars is easy and fairly cheap, depending on what you do to the jar.

You will need:
1 glass jar - any size.  I used a really large pickle jar, yep a pickle jar!
1 can of spray paint, any color
1 tube or jar of craft paint, any color
1 can of clear spray paint
1 tube of crackle medium - optional
An extra color of spray paint - optional
A stencil - optional
Twine, jute or ribbon - optional

To begin with, after your jar is empty, make sure you clean it well with warm soapy water.  Remove the labels and you can either keep or throw away the lid. I keep the lids and will make coaster out of them, yep coaster!
I used nail polish remover and a flat razor blade to get the labels off. This was the most difficult part.

Next - Dry your jar really well.  After I towel dried mine I let it sit for 5 minutes or so while I got everything together. 

To paint the jar get an area prepped.  The spray paint does tend to make a mess. I only spray paint outside.  It must be a well ventilated area and the outside temperature needs to be above 36 degree's.  I put down a trash bag and tie it down with small rocks or wood.  I then placed my dry glass jar open side down in the middle of the trash bag. 

Step 1 - Make sure you shake your spray paint up until the ball inside the can moves around easily.  The spray away!  Check your spray paint can for drying times.  I let mine dry between coats.  I gave the jar 2 coats of spray paint.  I then let it dry overnight (you don't have to do this overnight step).
Step 2 - In the morning I then took my craft paint and began my next step.  Here you could apply a stencil or you could tape the jar off and spray paint another color then remove the tape.  There are many options you could do.  Use your imagination!  I chose to pour a blue paint over the bottom of the jar and let it drip down the sides.  I let that dry for a good hour then I lightly painted the blue with a crackle medium to give the blue a broken effect.  Again, I let this all dry overnight.
Step3 - My final step was the clear enamel spray paint.  Still with the open end of the jar down, I spray painted with the clear enamel spray paint, this made the jar shinny.  I let this dry for an hour. 
Step 4 - Here is where you can embellish your jar.  You could tie jute or ribbon around the top opening or you could leave it alone as I did.  You could fill your jar with sand and put a candle in it.  You could tie a piece of jute around the middle or top and hang a sea shell or other item from the twine or ribbon.  You can glue anything you want to the jar, small shells, wine corks - anything!  Use your imagination. 
For this large jar, I mean it is really big, I chose to stay simple and I just filled it with flowers from my garden.
Simple by really pretty isn't it!  I just love it.  My husband was amazed at it.  "How did you get the paint to run like that?" he asked me. 
Again, here are the steps I followed in pictures.

Clean your jar -
 Remove the labels.

Now you get to paint!
 After my gold dried, I chose to pour this shade of blue over the bottom of the jar.
 Then I let it run down the sides.
I let this dry for a while, then I brushed crackle medium over the blue.  When that dried I spray painted the entire thing with clear enamel.

 I LOVE it!  I put it around a my porch and I just can't decide where I like it more.  On this little metal side table I painted light blue...
Or on my table! 
This is a craft that you can adjust to your style and your friends will be amazed at what the 'vase' originally was!  I hope you try it. 

As always, I appreciate you stopping by.  I hope you come back. Next week I've got a great and easy shrimp recipe for you. 
You can follow me on Facebook at -
https://www.facebook.com/pages/Dragonflies-and-Thistles/491393717621010

Or Pintrest at -
http://www.pinterest.com/vicdenniso/

Or you can follow me directly here on the blog -
http://www.dragonfliesandthistles.blogspot.com/

I appreciate you reading.  Have a safe and happy week!
Victoria

Monday, July 21, 2014

You really can paint anything

I hope everyone had a great weekend.  Mine didn't go as planned but I sure did have fun.  I never did get to the thrift stores to hunt down a lamp, but there is always next weekend.

So last week I showed you how I transformed some ugly colored dollar trays into great trays and today I'm showing you not only how I finished one but I will give you a sneak peak at next weeks painting foray.

But first I thought I'd start with a beautiful sunset.  The sunsets here in Colorado are always beautiful.  Tonight's was no exception.
But on to the trays...
Remember these?

For this craft you will need:
Spray Paint - any color you want
1 tube of craft paint - any color you want
1 can of Clear Gloss spray paint
A stencil
Painters tape
A stippling brush - AKA a stencil brush
1 paper plate

I painted one of the trays black as one of my girls has a black and white bedroom.
 
I chose silver metallic for the Fleur de Lis
I used one of the smaller brushes for this stencil as it isn't that big.  I used the one to the immediate right of the large one.

Now... a thing or two about stenciling. It is easy BUT...
Always remember to dab off the paint on your brush prior to dabbing it on the item.  You want as little paint as possible on the brush.

Also... Make sure your stencil is down tight and secure, if not you will get a shadow effect, unless that is what you want, then cool!  Next, dab the paint 1 time and 1 time only... then be done! 
Alas the worse that could happen is that you mess up!  You then simply repaint and start over! No harm, no foul! 
So remember a little paint goes a long way.  Dab don't brush the paint on.
Easy peasy!

And whala!  You are done!
After it is dry then go over the piece with your clear gloss spray paint.  It will be shinny and pretty. 

Have you ever stenciled?  I did an entire border in my kitchen when we first moved in... now that was a job!

Next I'm going to share the almost outcome of my next craft project.
This started out as something you may not believe!


I can't wait till it's dry to share!  And wait to you see what it was before! 

Can you believe July is almost over?  Where has the summer gone?  Here is Colorado it is really just starting, my flowers are finally blooming and the days are getting warmer.  Secretly I can't wait for September, October and November - my favorite months.  I've got a lot of cool crafts I want to try for Halloween - yes I am thinking Halloween already!  This year has just gone by so quickly. Take advantage of every day because before we know it Christmas will be here and it will be 2015!!! YIKES.  Wasn't it just 2000 yesterday? 

So till next week - Stay safe and have a happy week.

Victoria

I appreciate you reading.  If you'd like to see something or have a comment just respond here!
You can follow me on Pintrest -
http://www.pinterest.com/vicdenniso/

You can also follow me on FB -
https://www.facebook.com/pages/Dragonflies-and-Thistles/491393717621010

Till next week! 

Monday, July 14, 2014

You don't have to settle

Have you ever looked at something and said..."I love this, but not the color, I wish it was in ..." - Well have you? 
Have you ever just loved a décor item so much but settled on the color because that was the only color it came in?  Well have you?
I know that I can answer, "YES" to both of these questions.  But no more! 

I have found the power of paint, spray paint, craft paint, house paint, heck any kind of paint! 

I know that I am probably late to this paint love party but gosh, let me tell you it is so powerful.  But better late than never!
I always thought that spray paint was difficult to use, it splattered, it was blotchy, in other words it just wasn't worth the $5.00 or more a can.  No more I tell you! No more!  Yes I am a convert.

I have spray painted a nightstand....
http://www.dragonfliesandthistles.blogspot.com/2013/08/nightstands.html

And now I've got the spray paint out again! 

I found these at the dollar spot at Target about 2 months ago.  I thought - I love them but hate all the colors (well the blue one I like).  These little plastic trays are great for holding jewelry or as a large coaster or even to hold a decorative item on a table.  But the colors were, well, awful for the most part.
But remember - that doesn't matter!  I can make them any color I like!  I HAVE THE POWER!!!!

Step 1 - Peel those horrible labels off.... do you know how hard that is?  I soaked them in soapy water and put rubbing alcohol to them to get the sticky residue off.
Step 2 - Decide what colors and or pattern you want them... plain?; striped?; dots?; wavy lines?; hearts?; Fleur de Lis? the options are endless.
Step 3 - After choosing your colors and or patterns you need to prep your painting area.  Spray paint does tend to be a bit messy, you may want to wear gloves.  I always spray paint outside on the junky messy side of the house and I use a trash bag as my backdrop.
Step 4 - Paint.  Make sure you shake your can really well - there is a little ball in the can of spray paint and it should move around easily, you will be able to tell when you shake the can.  Remove your lid and hold the can about 7-10 inches away from the object you want to paint.  Hold the nozzle down and move you hand in a back and forth motion till the item is covered. 


DON'T WORRY ABOUT MESSING UP!  If you did too much in one spot simple don't go near that spot again!  Trust me if I can do it you can do it!

Step 5 - Let your item dry.  You may need to do several coats to get the desired color you want.  The back of my can said the drying time was 10 minutes to the touch... which means I should be able to pick the item up after 10 minutes without leaving fingerprints or messing up the paint.  If you live in a more humid are you will want to let your paint dry longer. 
Step 6 - If you want only 1 color, well you are done!  If you want another color, say polka dots - place the dots where you want them, spray paint the new color over the item till you have the desired color then remove the dots and let the item dry. 

For this project I chose to paint 1 of the trays a single color, gold.  I placed the tray under my salt lamp. 

The other two tray's I haven't been able to complete yet.  One is black and one is white.  The black one will have a Fleur de Lis in the center and the rest will be painted gold.  The white one will get dots then a painting of black. 
It has been raining here, crazy rain on Saturday, my basement almost flooded again.  You can't spray paint in the rain or when it is below 35 degree's as the paint will be hard and gloppy (that's a technical term there... gloppy - meaning full of glop!).  It rained on Sunday afternoon and again today after 4 right when I was leaving work.  So I haven't finished the other 2 yet.  I'll share the finished product when I am done. 
But back to painting things....
Did you know that you can paint glass?  Yes you can!  If you like the sea glass look you can take 1 part paint, 1/2 part white glue and 1/2 part water - mix well and paint!  It will look like sea glass.  I can't wait to try that on some Mason Jar's.  They are all the rage and the colored one's are crazy expensive for what they are. I've also got a really large jug that once contained some pickles.  I'm washing it and I'm going to use some craft paint on it and see what I come up with.  I think it will look great possibly dipped in gold paint and a nice jute sting around it with some sunflowers from my garden.  You can also paint terra cotta, but make sure the terra cotta is wet, really wet, before you paint otherwise it will just continue to soak up your paint color. 

Have you ever painted anything?  How did it turn out? 

I hope everyone has a great week.  I'll be back next week with another craft to share.  Until then be safe.
Victoria
As always I appreciate your support! 

You can follow me on Pintrest...
http://www.pinterest.com/vicdenniso/
Facebook -
https://www.facebook.com/pages/Dragonflies-and-Thistles/491393717621010
And here directly to your e-mail -
http://www.dragonfliesandthistles.blogspot.com/

Tuesday, July 8, 2014

Salt Lamp

I hope everyone had a safe, happy and fun filled 4th of July.  We went camping in the mountains over the holiday.  We camped in a town called Pagosa Springs, Colorado.  Like Colorado Springs, where I live, Pagosa is a town that established itself because of the healing hot springs.  However, unlike Colorado Springs, Pagosa is a sulfur spring so the entire town smells like rotten eggs but you do get use to the smell.  Manitou Springs, which is within 5 miles of where I live, is a mineral spring.  Like Colorado Springs the waters in Manitou are more for drinking than soaking like Pagosa.  Colorado is filled with natural springs, many that flow into large rivers and lakes. 

While in Pagosa shopping, what else would I do right!  Anywho, I found a shop that specializes in rocks.  Now you may be thinking... 'ROCKS? what is the big deal about rocks?'.  But did you know that many rocks have medicinal powers?  No, you don't grind them up and eat them but you do keep them around or wear them. 

I bought a salt lamp.  Now I know that many of you, like myself, don't know what a salt lamp is, so let me explain.
This inconspicuous rock is really a large block of salt.  It is ground out on the inside and you place a light inside.  Salt rocks usually come from the Himalayas and were formed millions of years ago. The lamps emit negative ions that clean and purify the air.

So what's the big deal you may ask... well let me tell you.  Negative ions are good for you and your health.  It's the positive one's that are bad.  We get bombarded with positive ions every day via electrical appliances.  These positive ions are to blame for lack of energy and even allergies and some diseases, depending on what sources you read.  Do you feel tired even after a well rested 8 hours?  It could be that you have too many positive ions around you. 

So this is how they work....When lit the salt warms up and pulls the moisture out of the air, as the water evaporates through the salt the lamp admits negative ions back into the air.  You know how great the air is after a thunderstorm?  Well that is because the air is full of negative ions at that point. 

What are the benefits of a salt lamp?  Well, the negative ions reduce the EMF (electromagnetic field) pollution created by computers, cell phones, microwaves etc.  The lamps create a calming and relaxing atmosphere.  Supposedly they help with allergies (I am a sufferer and I'll let you know if the lamp helps me).  These lamps are even touted to help with headaches including migraines.  Some websites even say that the lamps can help remove 'free radicals' from your body and the air.  Free radicals are known to cause certain types of cancer. 

DISCLAIMER - I am not a Dr. nor an expert.  I am only telling you about information that I've gathered on these lamps, and there is a LOT of information out there.  Just do a web search on 'salt lamp benefits' and you'll be bombarded with information. 

Personally, I like the glow. 

Caution:  These lamps can sweat so don't put them directly on a wooden surface if you live in a humid area.  You might want to put the lamp on a tray regardless.  Also don't place directly on anything electronic because they do sweat, they may drip water.  In the pictures above I've got mine directly on the table for photo purposes only.  Even in arid, dry Colorado I'm going to put mine on a tray or plate of some sort. 

These lamps come in many different shapes and sizes and many different prices.  At the Rock Shop I paid, $16.00 for my lamp but I've priced them online at upwards of $50.00. 

Does anyone already have a salt lamp?  Do you find that they work for you?  Is anyone else as skeptical as me? 

I'll let you know if mine helps my allergies and if I notice a difference in the air quality. 

I'm only going to be blogging once a week beginning this week through August.  I'll start back up twice a week in September.  So many activities planned in July and August but I'll be sharing lot's of pictures! 

Till next week - stay safe!
Victoria

As always you can follow me on Pintrest -
http://www.pinterest.com/vicdenniso/

Facebook -
https://www.facebook.com/pages/Dragonflies-and-Thistles/491393717621010

And you can sign up for the blog right in your inbox -
http://www.dragonfliesandthistles.blogspot.com/

Thanks for stopping by, I truly appreciate your support.